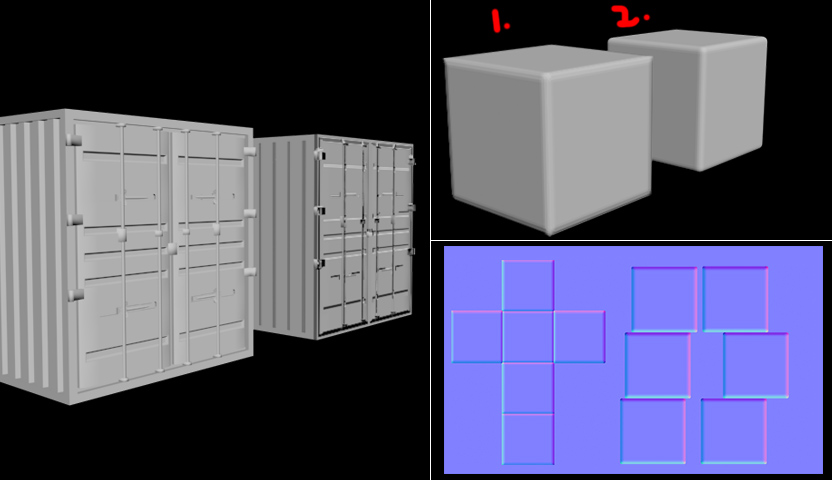
Today I am going to tell you about making Normal Maps and using them, for beginners of course.
So what is Normal Map & why do we use it?
In simple words its just a map that contains the depth information of an object. We use it to project the details of that particular object to a much simpler object.
As we all know it takes a lot of time to render a high-poly model in comparison to a low-poly model. If we use high-poly models in video games game then it will need a super computer to run.
So we take all the depth info of the high-poly model into a Normal-map and place it on a low-poly model to get the same results in much less time.
OK, so lets start, i am going step by step to make you understand better.
- First, start with a simple box and make a copy of it.

- Select all the edges of one of the box and chamfer them. So you could get some smoothness on its edges. Don't forget to rename them, the box having less polygons i named it as low-poly & the other one having smoothness (more polygons) as high-poly.

Note - To get correct projection, you have to unwrap the UV of the low poly object.
ALSO READ : UV UNWRAPPING FOR BEGINNERS
- As this is just a simple experiment, Lets just use basic unwrapping.
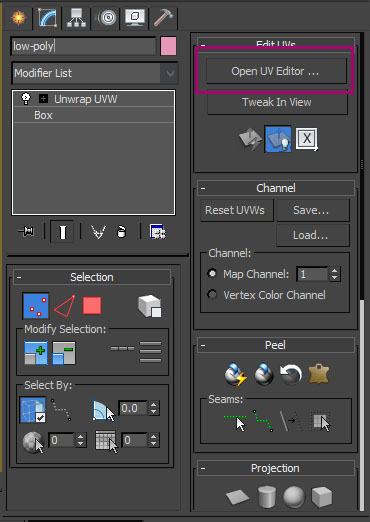
- So, select low-poly box & add modifier 'Unwrap UVW' from modifier list.
- Now select Open UV editor.
- Right click, choose face and select all the faces. Go to menu - mapping - flatten mapping.

- Now select any of the box , hit shift+A or click on align tool & click on other to align both boxes at same position.
ALSO READ : Some Handy 3Ds Max Shortcuts (Hot Keys)
- Now select the 'low-poly' box & press '0' ('0' in numbers right above the letter 'P' on your keyboard) or go to menu - rendering - and select 'render to texture'.
- You will see a window like this.

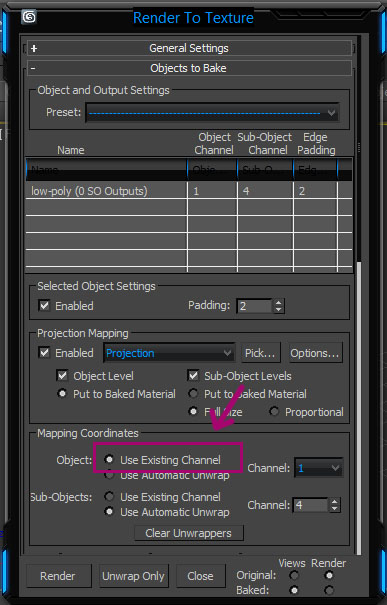
- In this window, leave the general setting as it is. Come down to the menu 'Objects to Bake'. Here you will see the name of the box you have selected (low-poly). Below that click on the option 'pick' and select the 'High-poly' box from the menu.


- In mapping Coordinates select the 'Use Existing Channel'.
- Next, come to the next menu 'Output'. Here click on 'Add..' and select the 'normal map' from the list. Below that you can change the name, location (where the map will generate) & the size of map as per your requirement.
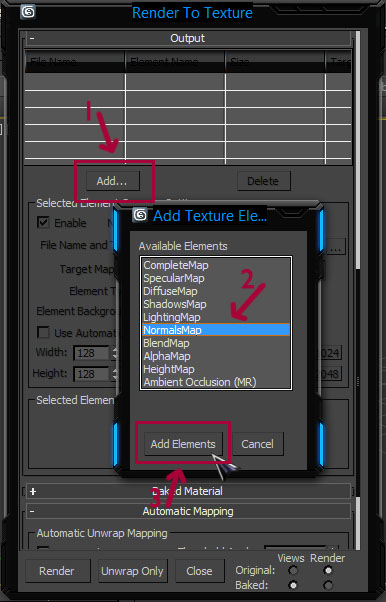
- To change location and name hit the '...' button next to the name of the map and for the size click on any button you desire or type it manually.
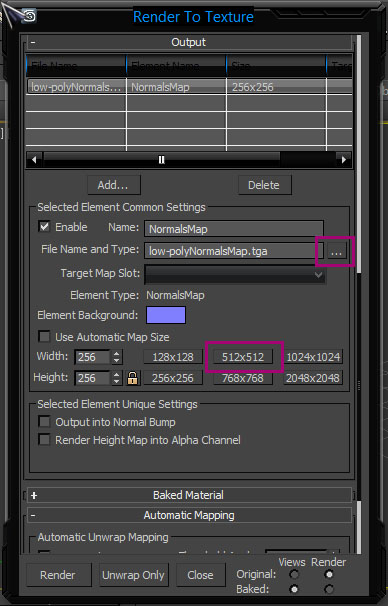
- Leave rest of the setting as it is and hit 'Render'.
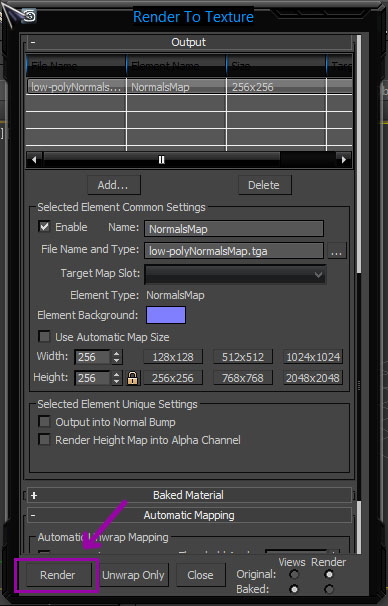
- After the render, select the 'low-poly' box and drag it little away from the 'high-poly'.
- Now, Go to material editor (press M), select any of the slot and apply it on the 'low-poly' box.

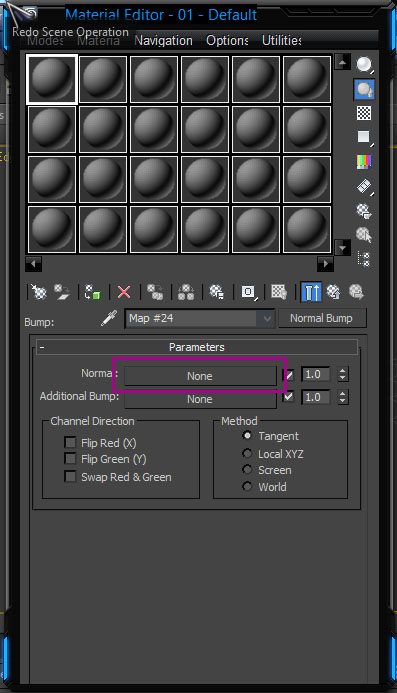
- Go down in the menu, under the option 'Maps'. Change the 'Bump' value to 100 and click on the button next to it.
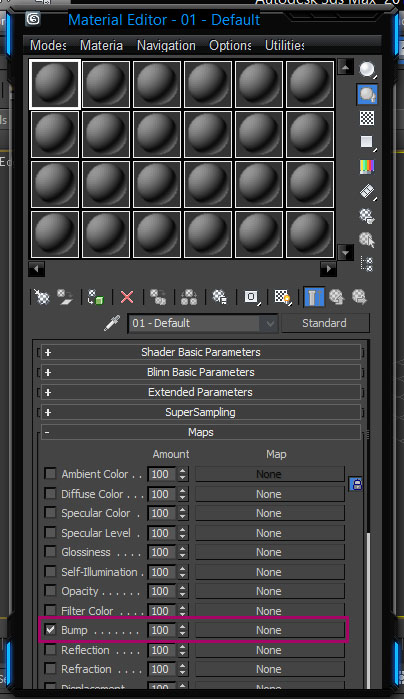
- Select Normal Bump from the pop-up menu.
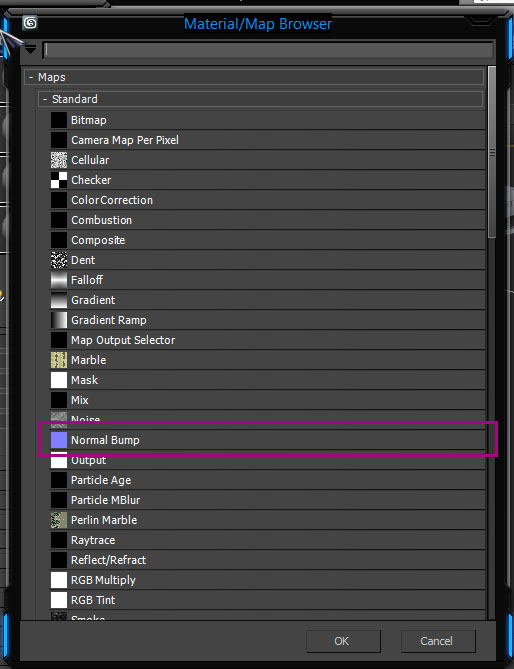
- Here select the first slot and call the Normal map that was just generated.
And result is in front of your eyes. 'low-poly' box is having the same smoothness on its edges, just like 'high-poly'.
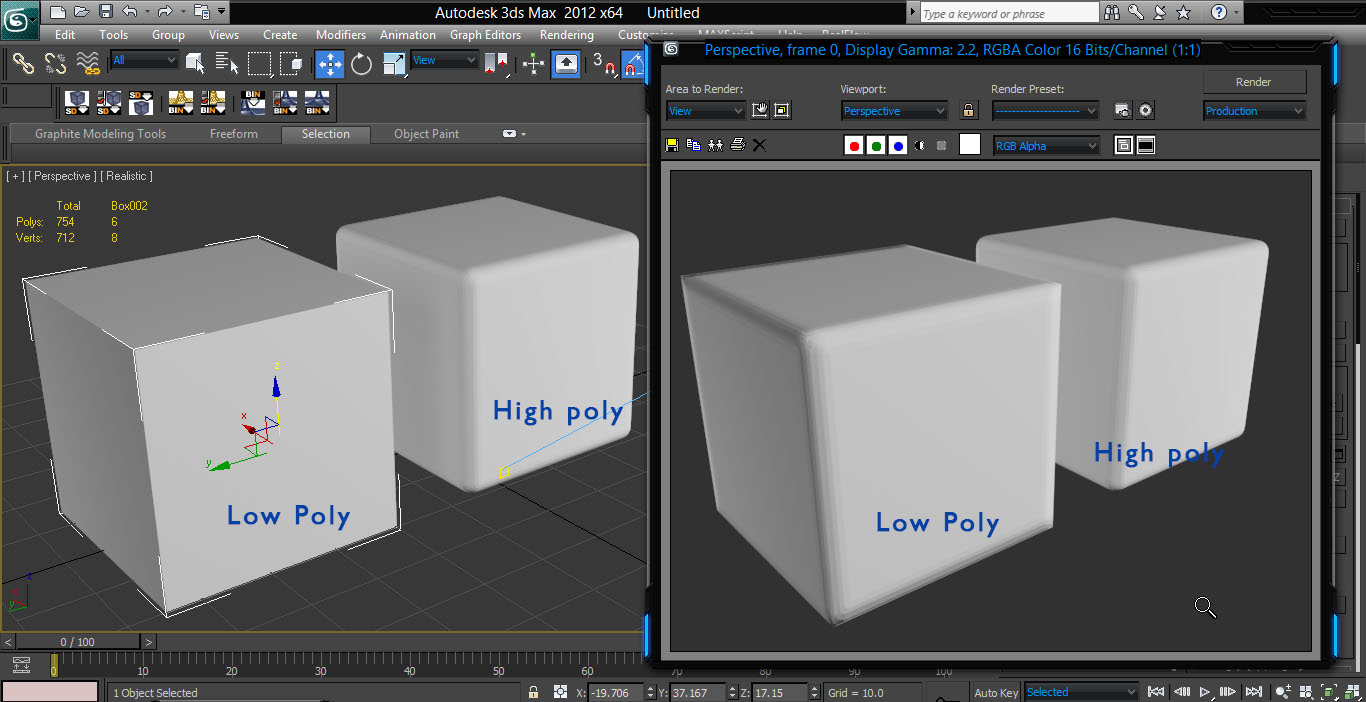
This was just a basic experiment. Now lets try it on a little hard one.
Create any thing you want with as much poly as you want. Also keep in mind that the low poly model should have the nearly same dimensions as high poly.
I created a shipment container from a box that i copied in starting. And applied some more geometry to it, to make it feel better (not just a flat box)
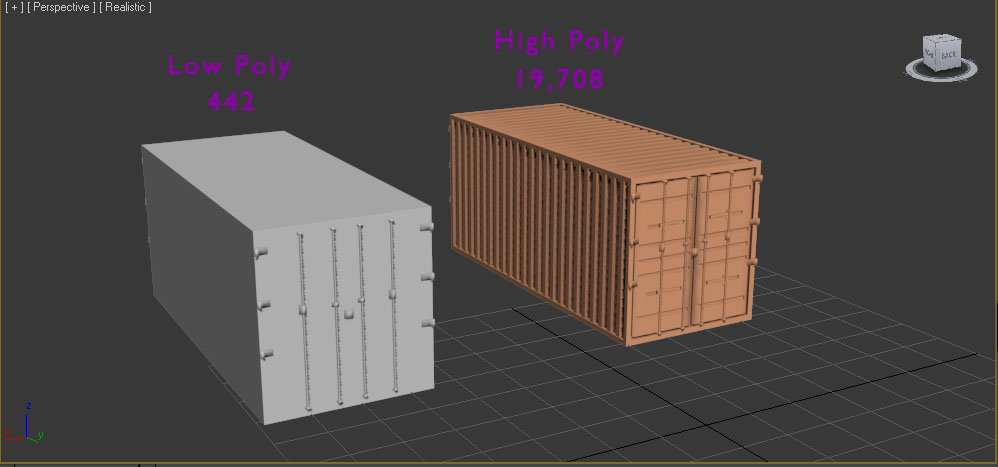
Now, we go through all the steps to generate normal map and Here is the result.
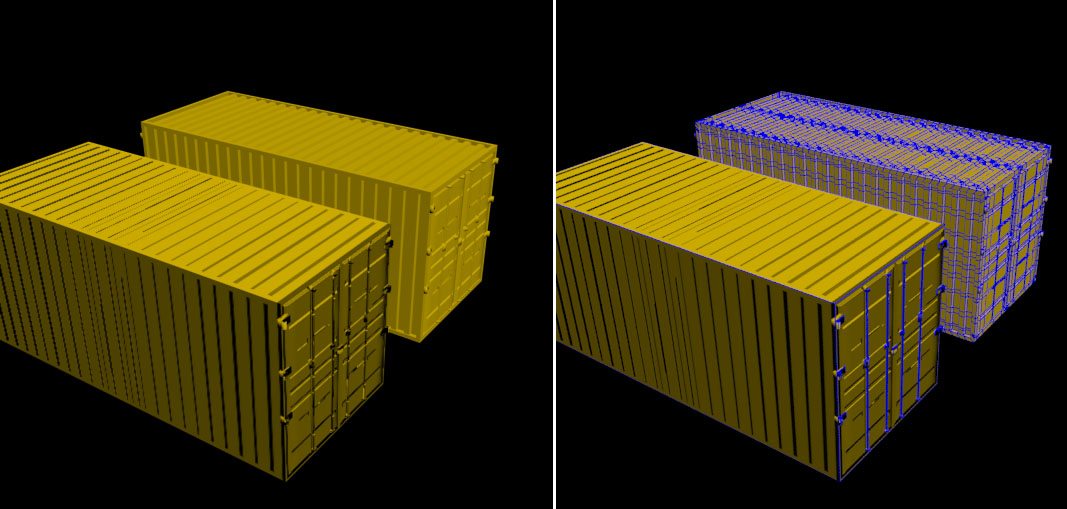
So, this was the basic way of making normal maps. I will explain the whole normal map concept in my next tutorial.


